Things to know about cutting glass
If you’ve never cut glass before or are just starting out you may be wondering how glass cutting actually works. Glass is technically neither a solid nor a liquid, it’s what’s called an amorphous solid. When you cut it, you’re not actually cutting it like you would paper or fabric; you’re scoring the glass, which breaks the surface tension and allows the molecules to break away in a controlled fashion as you apply even downward pressure to the score.
Tools you’ll need
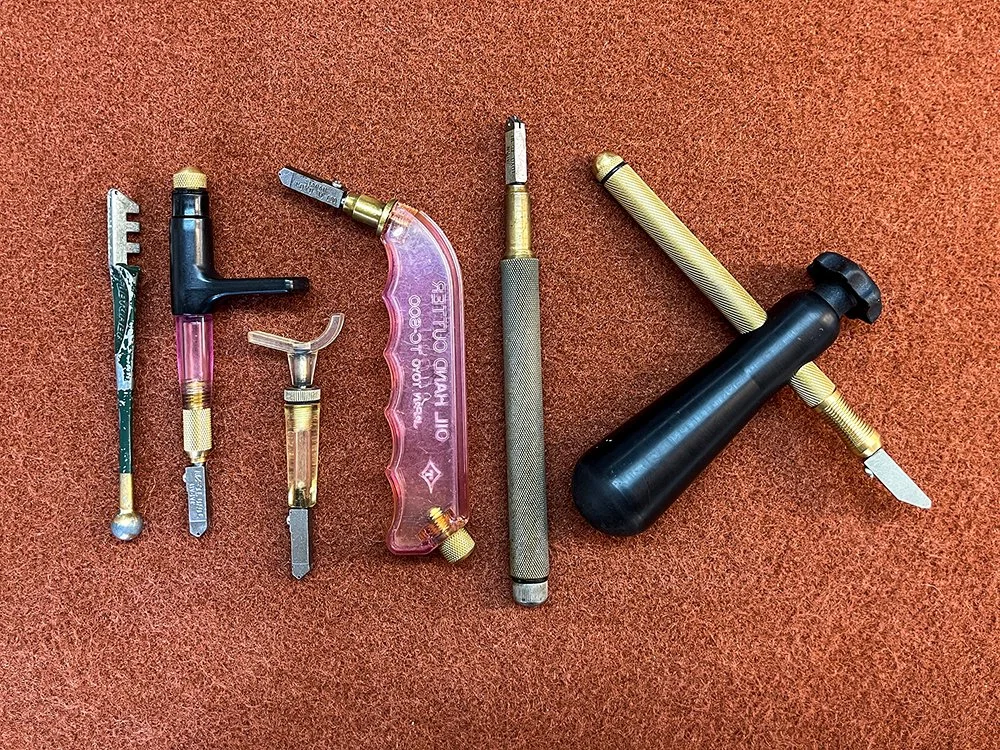
Glass Cutter: This is a handheld tool that scores the glass. Industry standard is to use a cutter with a tungsten carbide wheel due to it’s durability, hardness and moderate cost, but there are also glass cutters made with steel or diamond cutting wheels. There are a few things you want to consider when choosing a glass cutter:
The ergonomics of the cutter you choose is very important. If you plan on cutting glass often you want to find a tool that is comfortable and won’t hurt your hands/wrist after long periods of working. My mom and I find the pistol grip style of cutter the most comfortable. I recently bought myself a new brand of cutter (Silberschnitt) that only comes in a pencil grip, so I made sure to get a traverse handle for it so I can hold it more like a pistol grip. But keep in mind what works for us might not work for you, so we recommend trying as many styles as you can if possible. (This is one benefit of taking one of our in-person workshops, we have a variety of cutter styles—the OG fletcher fixed blade cutter, Toyo pencil grips, Toyo Thomas grip, the Toyo custom grip and the Toyo pistol grip—for you to test out before investing).
The cutting head width, wheel diameter and the angle of the cutting wheel all play a roll in how your glass will cut.
If you’re choosing a more specialized glass cutter than the standard fixed blade style you can get at the hardware store, there are generally two types of cutting head widths. One is a narrow cutting head, generally referred to as a pattern head. These are used for cutting shapes and are more precise. The other is a wide cutting head that is better suited for straight cuts. If you are going to be cutting both straight lines and more complex shapes, but only want to get one cutter/cutting head, I would recommend the pattern head due to it’s versatility.
The diameter of the cutting wheel influences the precision and control of your score which ensures a clean and accurate break.
Smaller diameter wheels are ideal for thin glass and more intricate cuts. A smaller diameter wheel has a shorter footprint on the glass, requiring less pressure to get a proper score, reducing the likelihood of chips and sharks teeth—dagger-like imperfections on the edge of the glass. Because of the shorter footprint, smaller diameter wheels are also better suited for tighter curved cuts as they are able to travel them more smoothly. If too large a wheel is used on tight curves, the wheel will scrape the surface of the glass causing glass particles to appear on the score line, resulting in a poor quality break.
Medium diameter wheels are the most versatile, working with a wide range of glass thicknesses and provide a good balance of durability and control.
Large diameter wheels are a must for the thick glass and provide the needed stability and depth to achieve clean cuts.
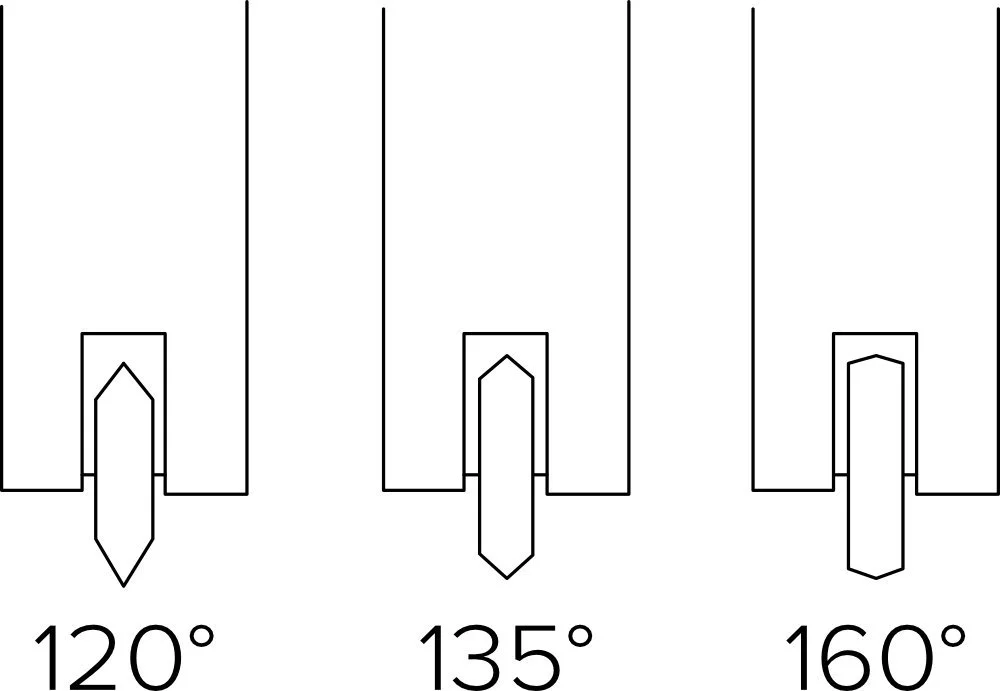
The angle of the cutting wheel determines the depth and quality of the score. You want to select a wheel angle based on the glass thickness you want to cut, this ensures a clean break and minimizes chipping.
Steeper angles, 120°-135°, are best suited to thin glass (2-3mm). These cutting wheels produce fine scores with minimal pressure, which reduces the risks of chipping, resulting in a smooth and clean break.
Medium angles, 135°-145°, are your most versatile angle and offer a balance between depth and control allowing it to provide clean scores with minimal force on a wide range of glass thicknesses (4-8mm).
Shallower angles, 155°-160°, are designed for thick glass (over 10mm). These wheels provide better stability and can withstand the extra force needed to produce the deeper score needed to cleanly break the extra thick glass.
If this seems like information overload and you just want to know what type of cutter is good for someone looking to do glass as a hobby, but that would transition into a professional setting okay too; we think the Toyo brand cutters are a perfect choice. All of their Supercutters are reasonably priced, have wheel angle of 140°, and seem to work well cutting the majority of the glass we use in our studio. Regardless of the brand you decide to go with, buy the best possible cutter you can afford. Having a comfortable, high quality cutter will save you money in the long run.
Cutting Oil: Cutting oil lubricates the cutting wheel, removes any chips it might have collected and reduces friction all of which not only helps achieve a good score, but also extends the life of your cutter. We personally don’t like using the oil reserves built into our cutters as they generally release too much oil and make a mess. Instead we put a small paper towel or sponge in the bottom of a jar and cover it in cutting oil. Every 2-4 cuts we will roll our cutting wheel over the paper towel. We highly recommend using a cutting oil specifically made for glass cutting tools. It is not that expensive and a bottle will last you so long that it’s worth it knowing it’s going to work as intended and not going to wreck your tools.
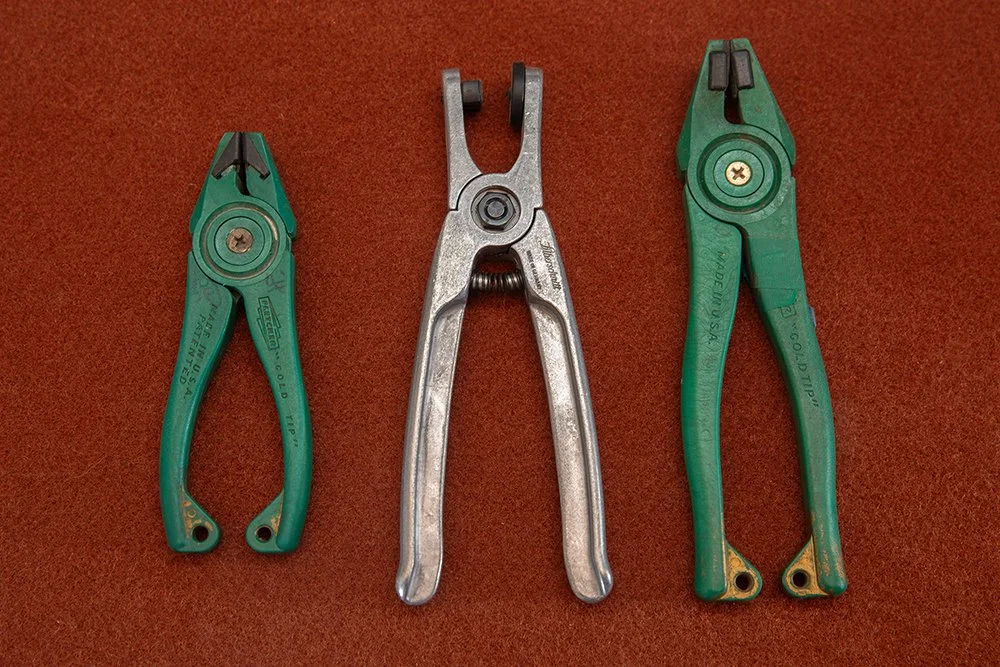
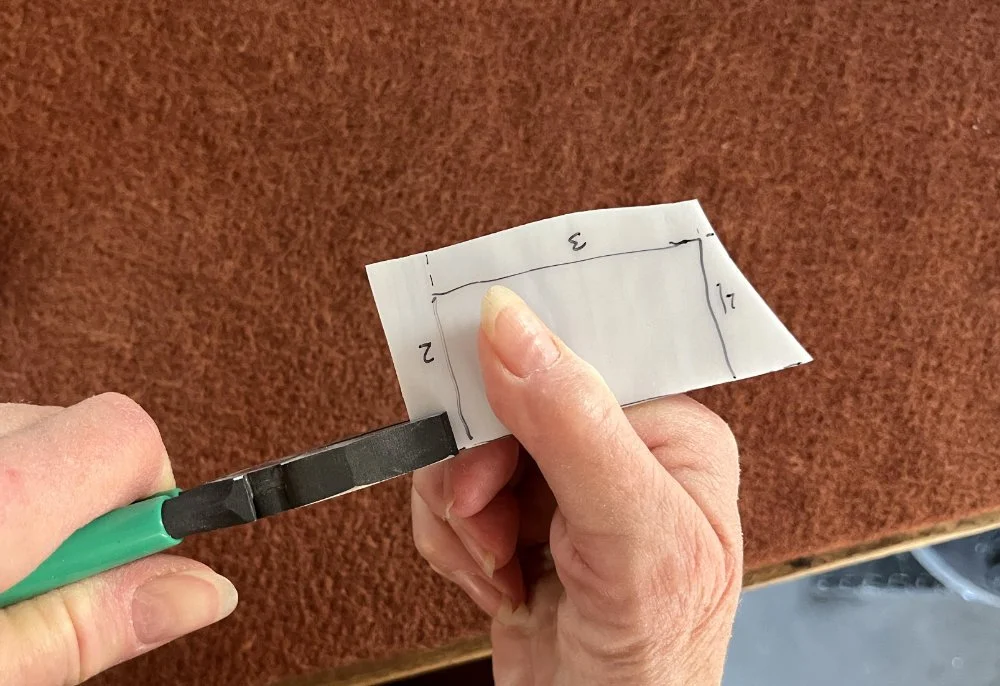
Grozing Pliers: These are dual purpose pliers with a flat jaw and a curved jaw. When the flat jaw is on top they work as breaking pliers to help pull the glass apart at the score line. When the curved jaw is on top they work to groze or break/chip the glass away from the edge of the glass in a controlled manner. If you’re only going to buy one pair of pliers, we recommend grozing pliers because they are a bit more versatile than running pliers. We use both the standard 3/8” jaw pliers and each have a set of 1/8” jaw pliers for more intricate cuts.
Running Pliers: These pliers have a bump in the middle on the bottom jaw and two bumps on either edge of the top jaw, and work by applying even pressure to run the score line. There are also speciality running pliers like the Silberschnitt running pliers that are nice to have but are definitely not a necessity. They have a bump on the center of the bottom jaw and a rotating pad on the top jaw that are great for curves and thin strip.
A Clean, Stable Work Surface: Having a work area that is both clean and stable is critical when cutting glass. You need a table or surface that allows you to apply the consistent pressure needed to achieve a clean and accurate score line. It is extremely important to continually clean your cutting area as you work. This, one, helps you stay safe, and two, helps prevents scratches and bad breaks. If you try scoring your glass over a big chip or debris of some kind, the uneven pressure will likely cause your glass to break or chip as you score it. We like to cut on boards covered with indoor/outdoor carpet (see how to make one here) and we keep it clean by vacuuming between breaks. When I cut glass on a surface without the carpet I like to use a bench brush to sweep away any glass chips.
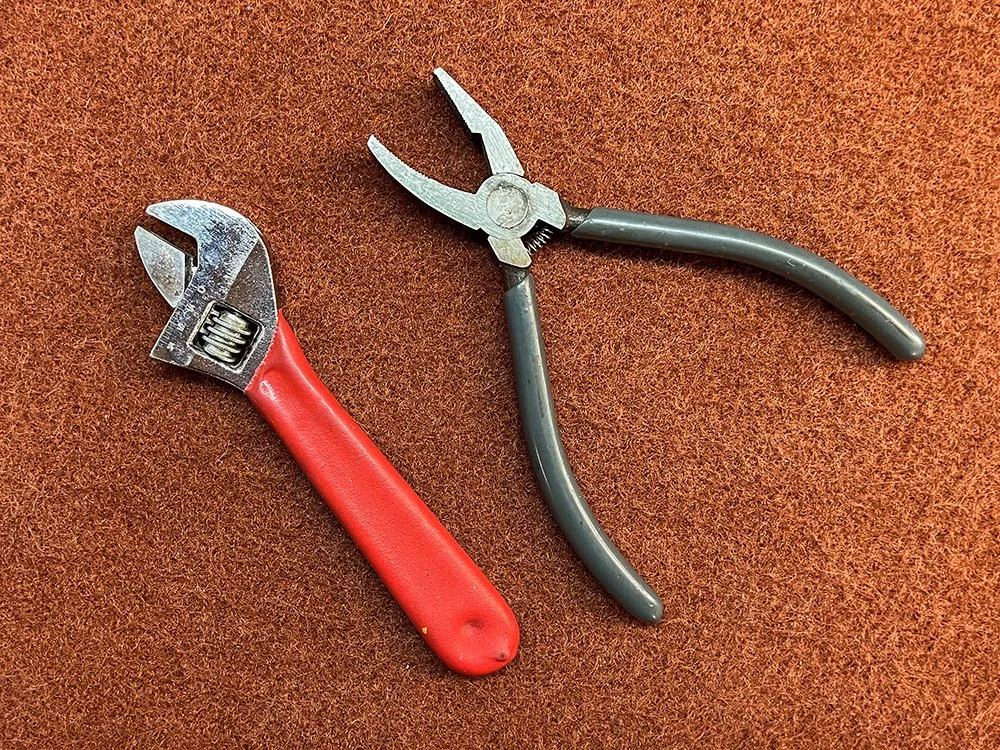
Crescent Wrench or Extra set of Grozing Pliers: When the piece of glass we’re cutting is too small to hold with our fingers, we like to use either a crescent wrench or an extra set of grozing pliers to hold our glass across from where we are pulling to run the score line to ensure the glass we want to keep is properly supported. These aren’t 100% necessary, but are extremely helpful to have and something we use regularly when cutting small pieces of glass or pieces with sharp points we don’t want to lose while breaking.
Safety Glasses: It is so important to stay safe and always wear safety glasses when cutting and grinding glass.
Things to keep in mind
The temperature of your workspace and glass: Extreme temperatures can cause stress on your glass while working with it. Specifically, cold glass reacts differently than room temperature glass (~70° F), it becomes harder to cut and more unpredictable. It is best to ensure your glass is fully and evenly warmed up to room temperature before cutting to ensure a more predictable break.
Regularly inspect your cutting wheel. Over time the cutting wheel will become dull and as it wears down it flattens, reducing the angle of the wheel. This results in needing more pressure to achieve a clean break and at a certain point will be very hard to cleanly break consistently.
If the axis holding the cutting wheel is worn and the wheel is able to move side to side, it will effect the angle at which the wheel is introduced to the surface of the glass. This negatively effects the score quality, ease of breaking, and edge quality and strength.
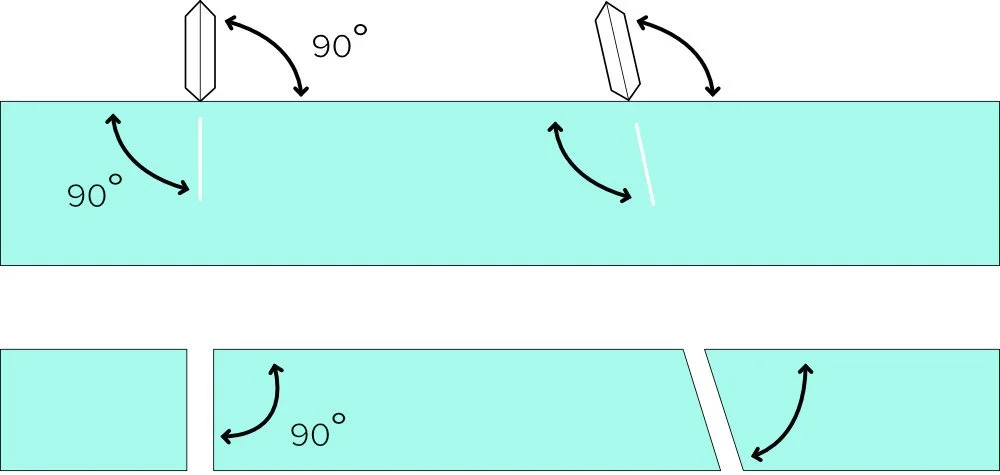
How you hold the cutter determines how your glass will break. Hold the handle of the cutter upright or slightly angled back towards your body and keep the wheel perpendicular to the glass. If the wheel is angled to either side while scoring your glass it will break at a bevel matching the angle the wheel was at. If the angle is minor it can be fixed with grinding, but if the bevel is large it could result in your piece being too small.
Move your body instead of the glass. We find standing, if possible, while cutting leads to a more consistent and uniform score because we’re able to use our whole body to follow our score lines, instead of just moving our hand or arm. When cutting tight or deep curves we set up the glass in a way that it will be comfortable to move our body to follow the curve instead of turning the glass as we score. If we turn the glass instead while pressing down with the cutter it could result in scratches if there are any glass chips underneath, as they will be ground against the glass.
Score the smoothest side of your glass. It’s easier to get a consistent, uninterrupted score line working on the smoothest side of the glass. We also like to use either the index finger or thumb on our free hand to help guide the cutting head across the glass. This helps use stay on track and if we hit a pit or divot in the glass we can easily push the head out without getting off track.
Ensure the glass is clean before scoring. If there is excessive dust, glass chips or debris on the surface of the glass it could cause the cutting wheel to skip. If this happens the score line may be interrupted which can result in a poor break. Clean glass also allows you to easily see any imperfections or scratches on the glass that you want to work around so they don’t end up on your final piece (we like to mark these before we place our pattern so they’re easy to see and avoid).
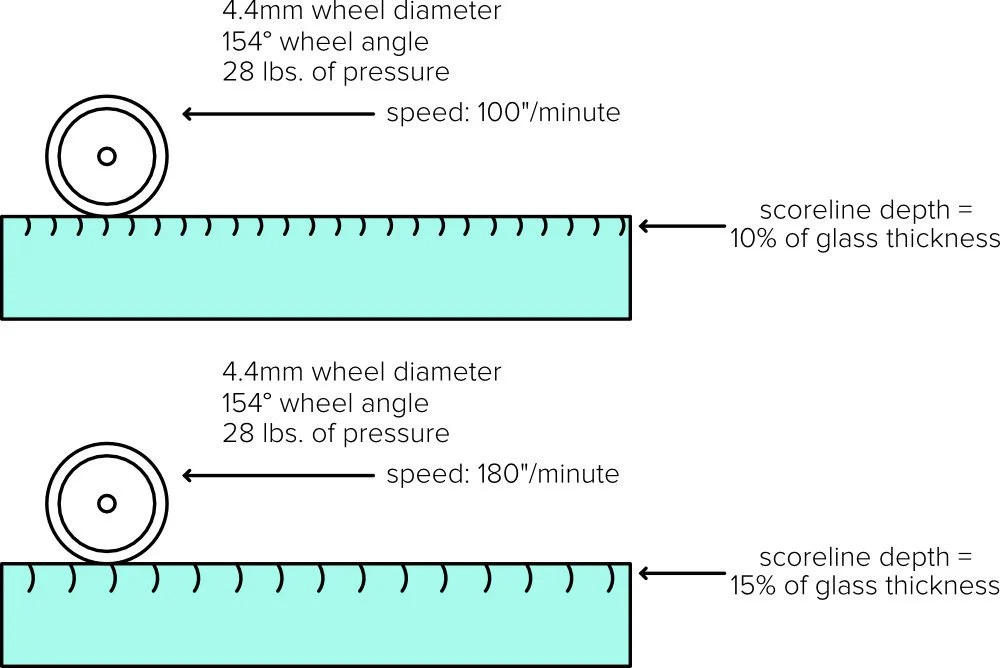
Apply even pressure at a consistent speed. Proper pressure works in conjunction with the diameter and angle of the cutting wheel to achieve a consistent, clean and smooth score and break. If too little pressure is applied the score won’t be deep enough to properly and easily break the glass. Too much force results in a score line with lots of visible chips and imperfections and the edge of the glass will likely have shark’s teeth after breaking. Too much pressure could also straight up break small thin pieces of glass in a way you don’t want before even finishing the score. Keep in mind thinner glass tends to need less pressure than thicker glass.
In addition to consistent pressure along the entire score line you want to apply a consistent speed to ensure a clean score that breaks easily. Sudden accelerations or decelerations can result in uneven scores. The speed at which you score basically acts the same as force; so increasing the speed of the wheel will increase the depth of the score line, which could result in glass particles appearing on your score line much the same way it does when you apply too much pressure.
Cutting glass takes patiences and isn’t something to rush. Maintaining a consistent pace allows you to not only focus on keeping consistent pressure, but also allows you to focus on accuracy and staying on your pattern lines.
Listen for a smooth consistent sound as you score, however be aware that not all glass, especially opalescent glasses, make a sound even with proper pressure.
Never score the same path twice. If you make a bad score don’t score over the same line again. If you lifted up mid-score for some reason, don’t start over from the beginning, start where you ended off and continue from there. Going over the same score twice picks up glass chips, which dulls your cutting wheel and reduces your chances of a clean break. If you need to re-score the glass we recommend just rescoring your glass right next to your initial score line, going slightly bigger than you need.
Don’t slam your cutter down off the edge of the glass when scoring. Hitting your wheel hard against the table can eventually cause flat spots on the wheel which will cause it to skip, resulting in an uneven score line and poor break. Although we have times when this still happens to us, we try very hard to either stop before the edge of the glass or pull our cutter up once we reach the edge.
Avoid tapping the score line whenever possible. We reserve tapping the back of the score line as an absolute last resort if our piece just won’t budge. Tapping almost always leaves jagged edges, resulting in excess chips and could cause internal fractures that could run during soldering or overtime. If you find you have to tap, do so directly under the score line to help reduce flared edges.
Break your piece immediately after scoring. This is a tip I just learned while researching for this blog post. If you let your score line sit for too long it will start to form fractures radiating along its entire length. This eventually will make it nearly impossible to run the score cleanly.
Never force the glass to break. To properly run a score always apply gentle and even pressure. Anytime I try to force the glass or apply excessive pressure it always ends up breaking badly or shattering unpredictably. If the score doesn’t break front the first edge of the score line, then I turn the glass and try to run it from the other side. I’ll repeat this until the score runs and the piece breaks out.
Support the glass: Always support the glass on both sides of the score line to ensure the glass doesn’t flex or bend during the breaking process. I do this by holding the glass as close (and safely) to the score line as possible, making sure my hands or hand and grozing pliers are directly across the score line from each other and if my fingers are too big to hold the glass where I need to, I use a crescent wrench or extra pair of grozing pliers to hold it to ensure it’s properly supported.
THE BASIC STEPS OF CUTTING GLASS
SCORE THE GLASS
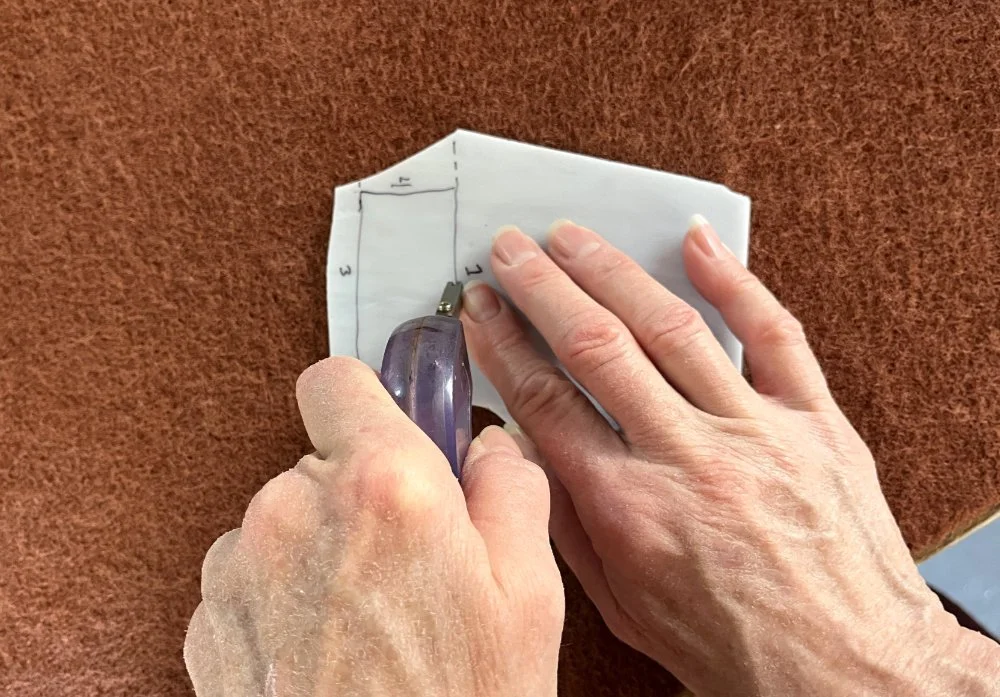
Whenever possible, we like to have the bulk of the glass under our non-dominate hand to make it easier to hold onto the glass. We always start our score line at one edge of the glass and follow the pattern, going all the way to the other edge of the glass. We also like to help guide our cutting head with either the index finger or thumb on our non-dominate hand. This not only helps us stay on the pattern line, but it also helps push the head out of divets or bubbles that are in some glasses.
2. Break out the Glass
TECHNIQUE 1: HANDS
This technique works for any piece you can comfortably hold in both your hands. When we break the glass using our hands we like to hold both sides of the scoreline as close as we possibly can, while being safe. We curl our index fingers so they act like a table top and have our thumbs parallel to the score line. We then gently pull in an out and downward direction. If the score doesn’t start running from the first edge then we turn the glass around and repeat it at the other end of the score line. We repeat this until the score runs and the glass pulls apart.
TECHNIQUE 2: RUNNING PLIERS
Line the line on the top of the running pliers up with the score line and apply gentle pressure. We like to hold our running pliers with our middle finger in between the handles to better control the pressure we’re applying. Again, we never want to force the glass to break. So, if the the score doesn’t start running from the first edge then we turn the glass around and repeat it at the other end of the score line. We repeat this until the score runs and the glass pulls apart. Sometimes we’ll bounce the running pliers while applying gentle pressure and that will help the score to start running. The running pliers only work if there is enough glass on both sides of the score line to fit fully under the jaws of the pliers.
TECHNIQUE 3: GROZING PLIERS
With the flat jaw up, place the grozing pliers perpendicular to the scoreline. We like to start at one edge of the score, not the middle of it. This helps ensure the glass is properly supported and gives the score time to run from one edge to the other. Like with the running pliers, we like to put our middle finger in between the handles to better control pressure. Applying gentle pressure, pull in an out and down motion. Like with the other two techniques we never force the glass, so if it doesn’t start running, we’ll try again on the other edge.
TECHNIQUE 3.1: GROZERING PLIERS AND A CRESCENT WRENCH
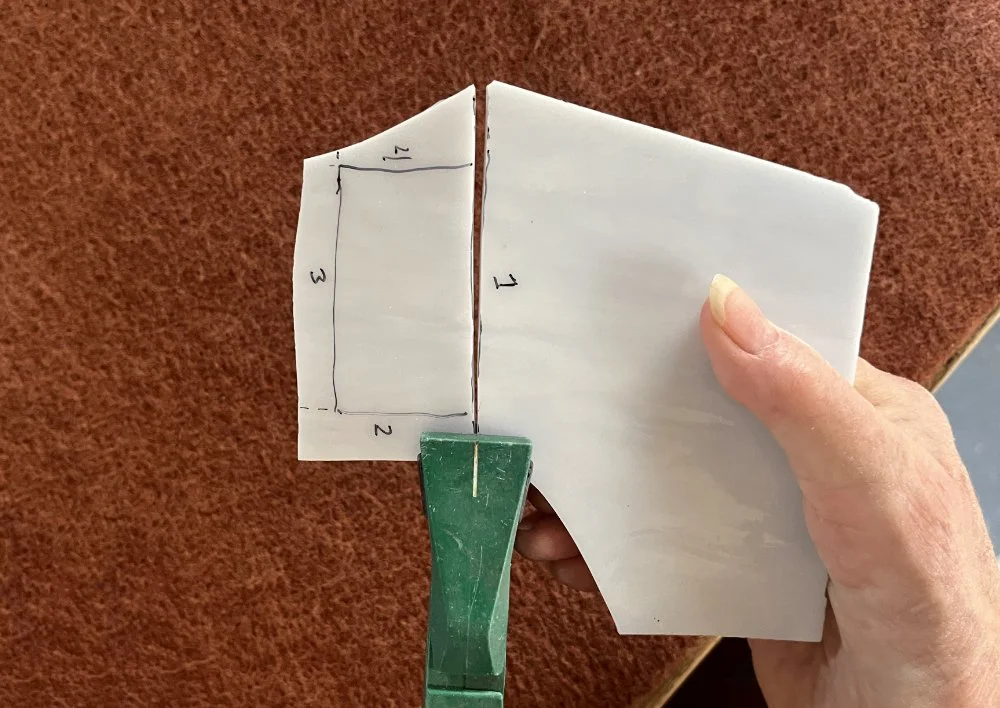
This is a great technique for when the piece you’re cutting is too small for you to hold with your fingers or there is a sharp point you want to make sure doesn’t break off. Using a crescent wrench (or second pair of grozing pliers) hold the piece you want to keep. With your thumb and index finger keep the crescent wrench adjusting wheel held tight. Always hold the glass opposite of where you are pulling with your grozing pliers, this ensures the glass is properly supported. Then continue as you would normally breaking glass while using grozing pliers.
I know that was a ton of information shared, but I feel like I barely scratched the surface on techniques we use when cutting glass. If you’re in or around the Reno, NV area and are interested in learning more advance glass cutting techniques, tips and tricks please check out the workshops we offer! If you’re especially interested in learning more advance techniques and testing out our speciality cutting tools our Stained Glass Techniques: Glass Cutting workshop is the one to keep an eye out for.


